

Step 1: Open your browser and search for Oracle edelivery in the search bar.
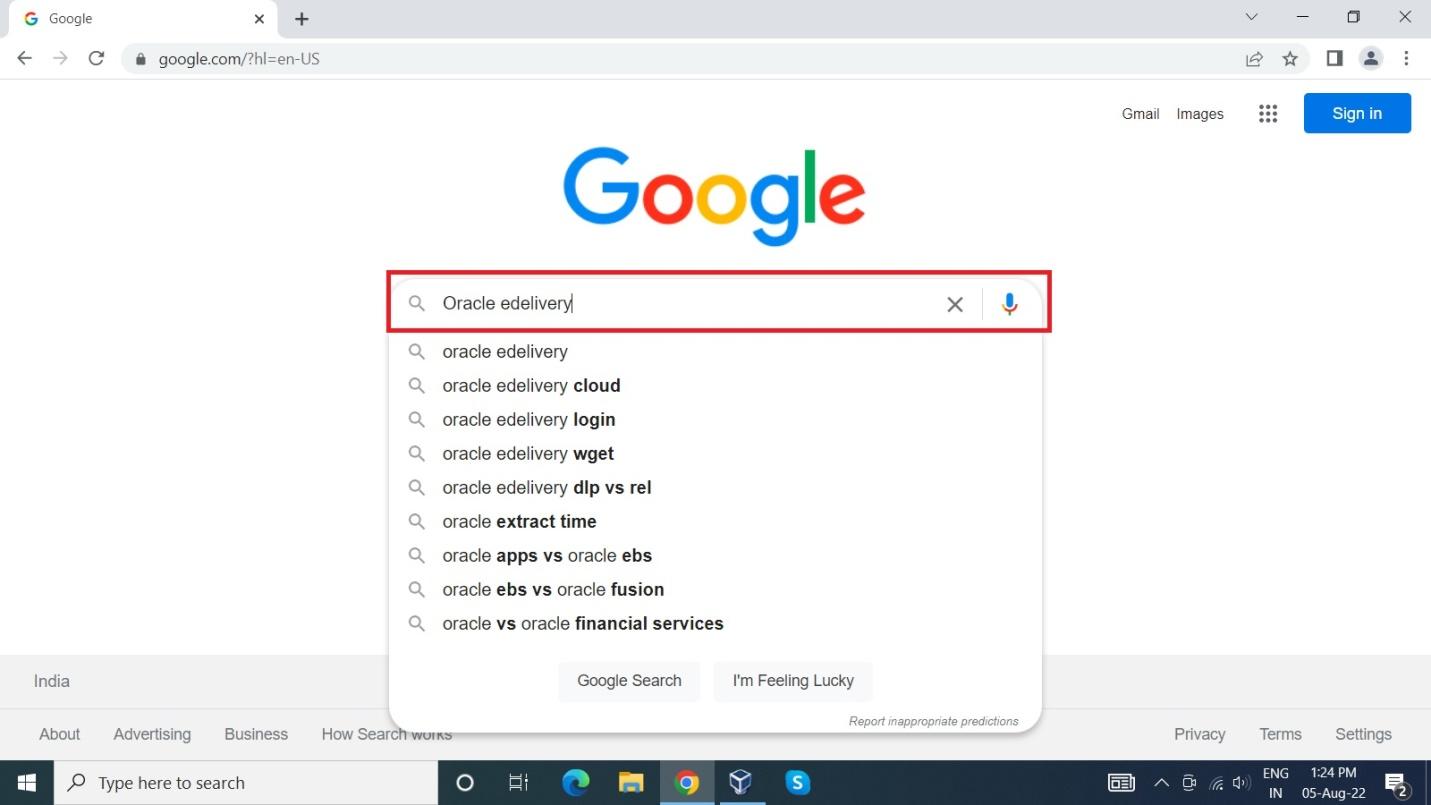
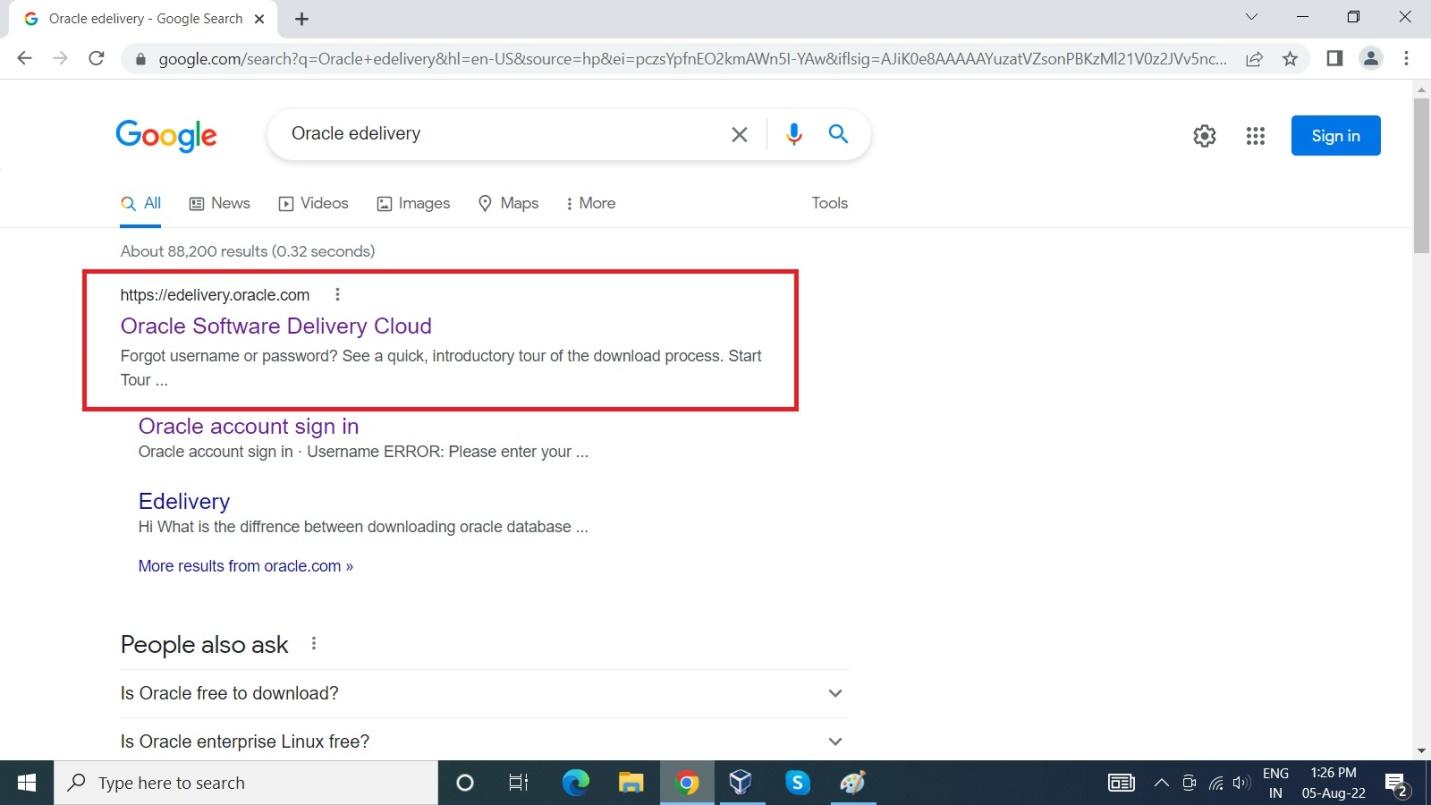
Step2: From the results, Click on https://edelivery.oracle.com.
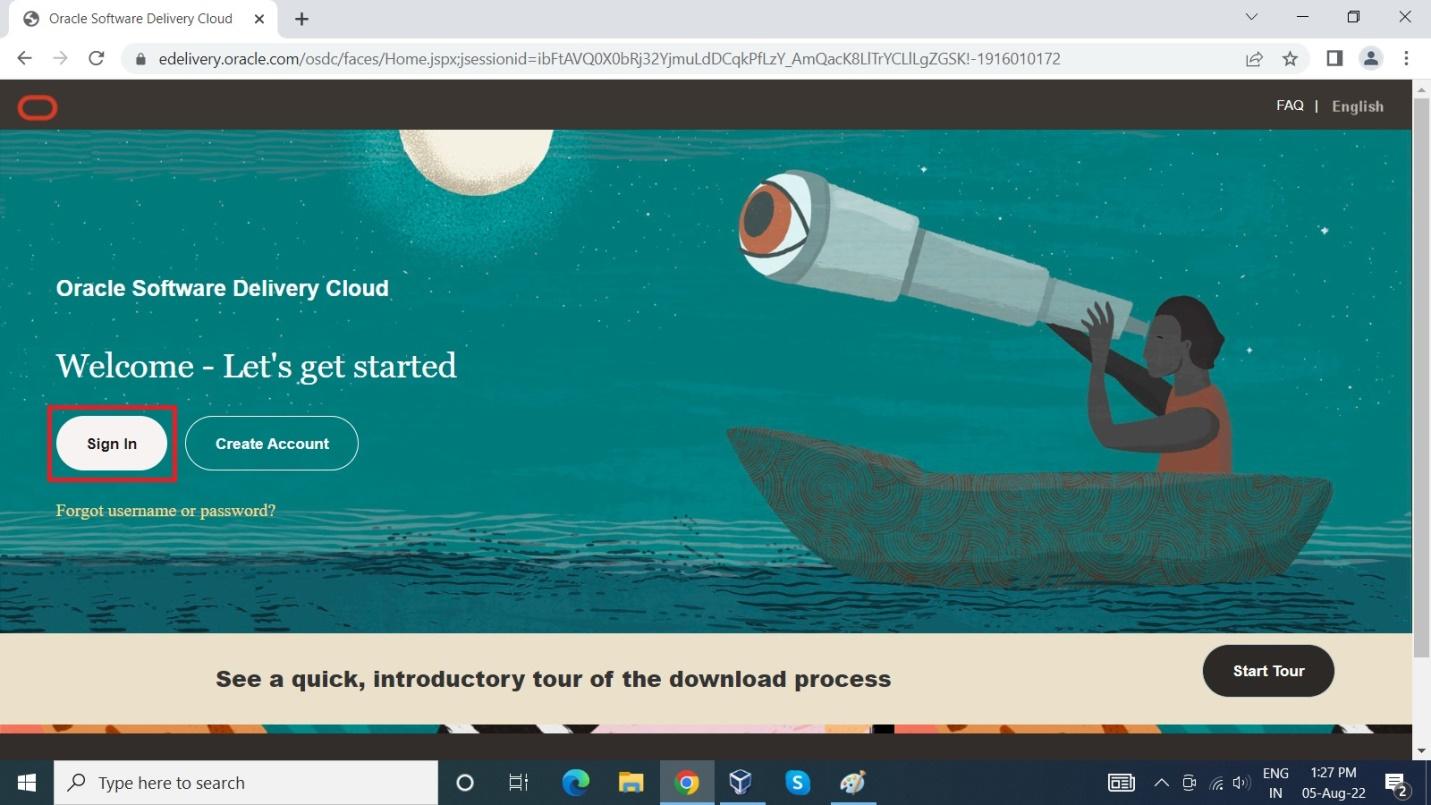
Step 3: On the Web page, Click on Sign In if you have oracle account. Or Click on Create Account to create a new Oracle Account.
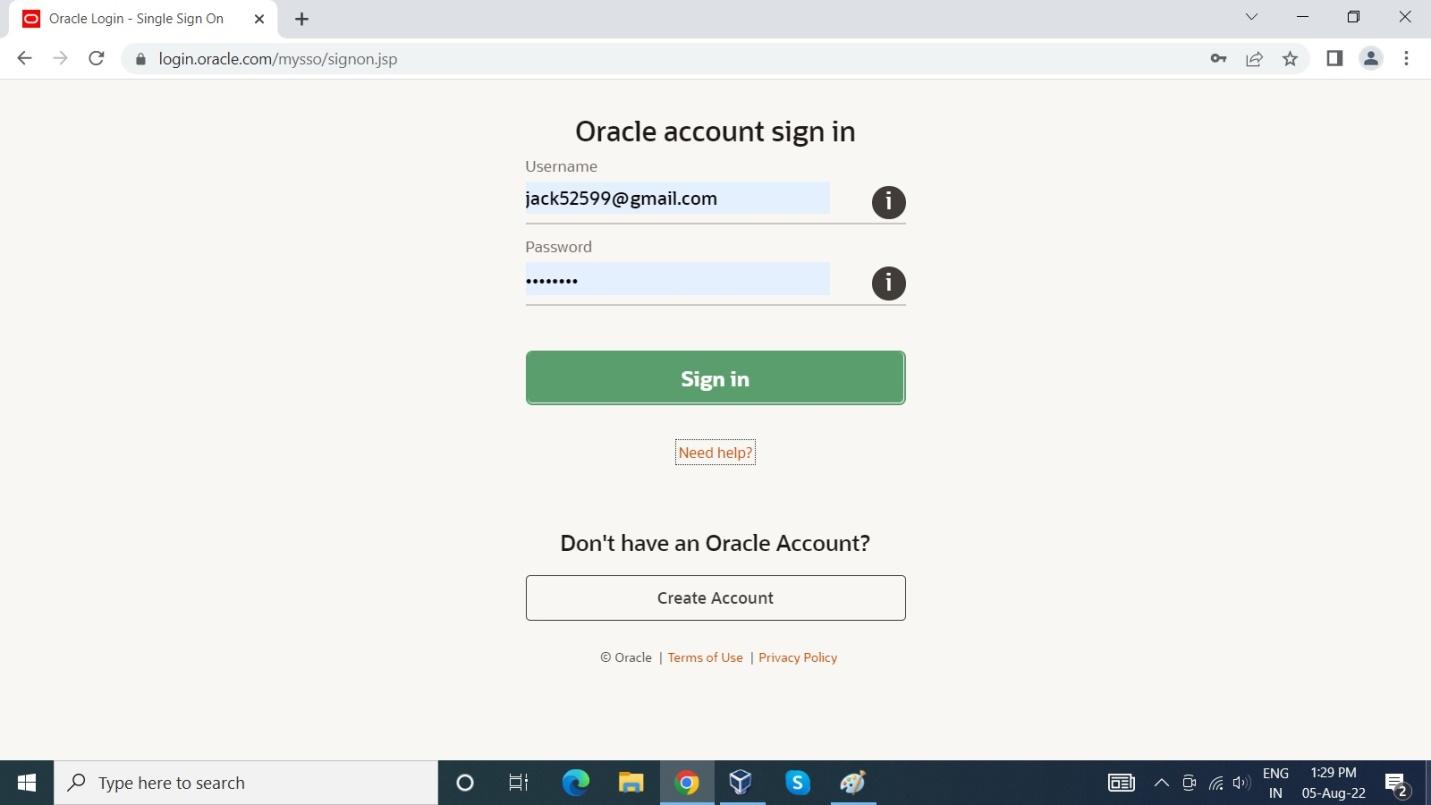
Step 4: Enter the Username and Password and Click on Sign In.
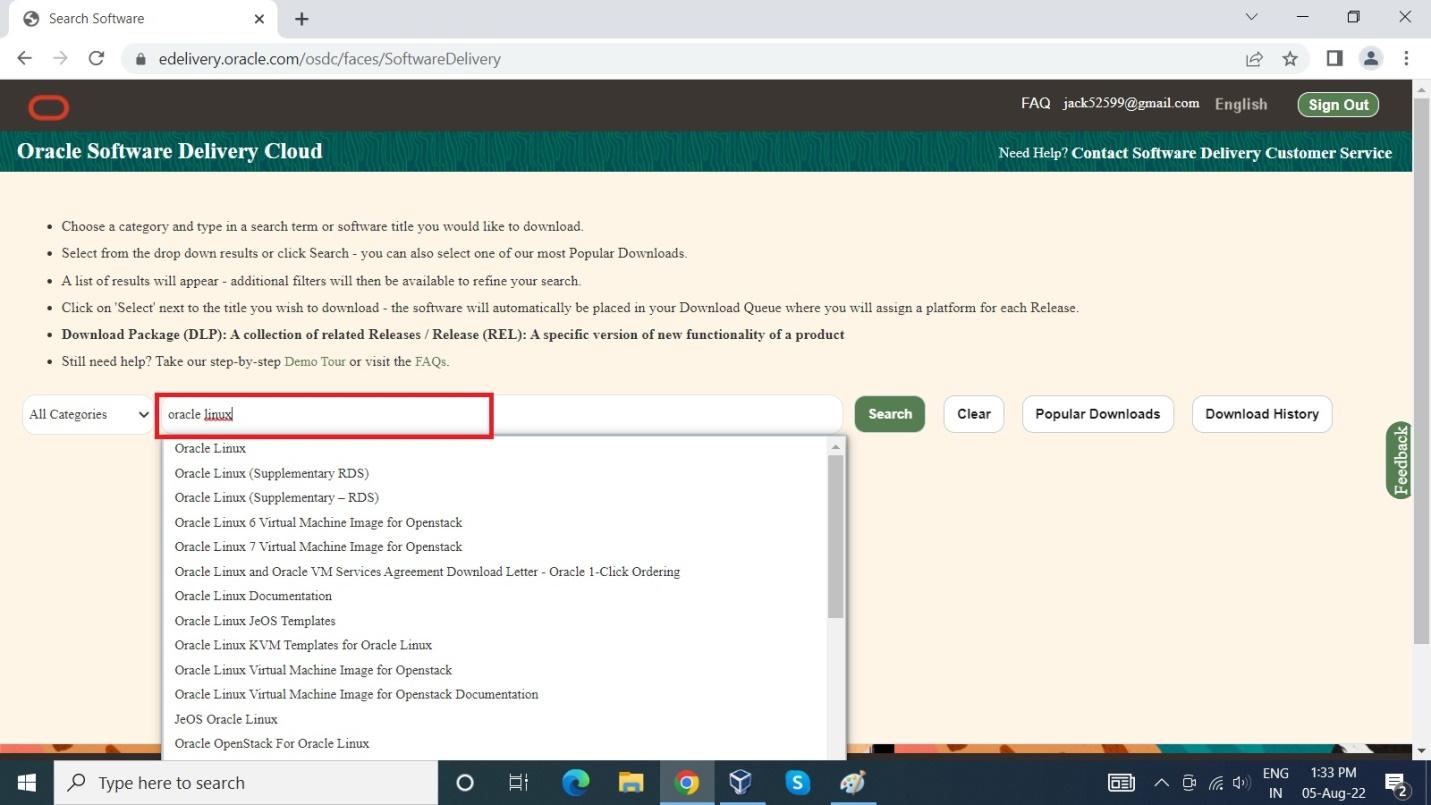
Step 5: After Signing In, Search for Oracle Linux in the Search Bar in Oracle Software Delivery cloud page.
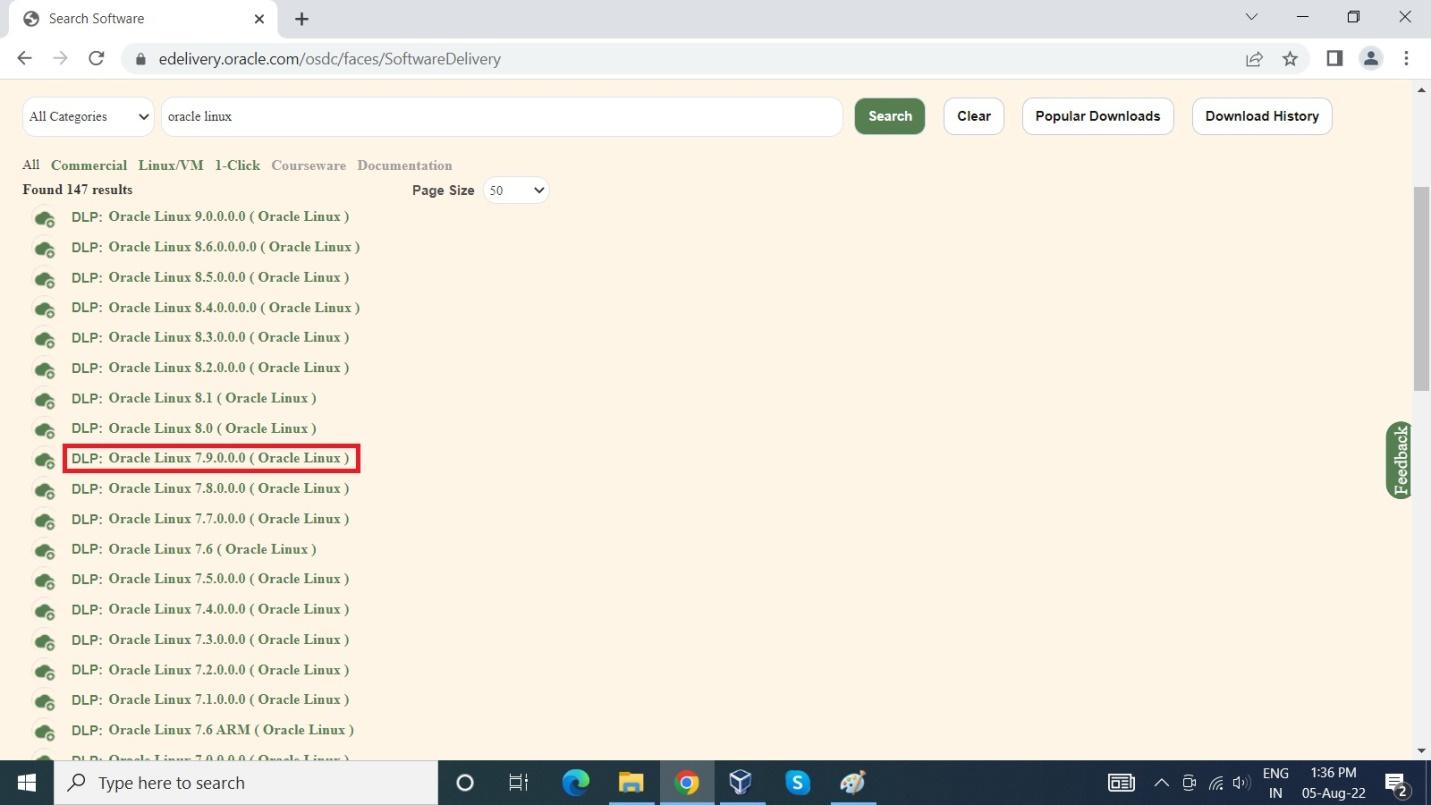
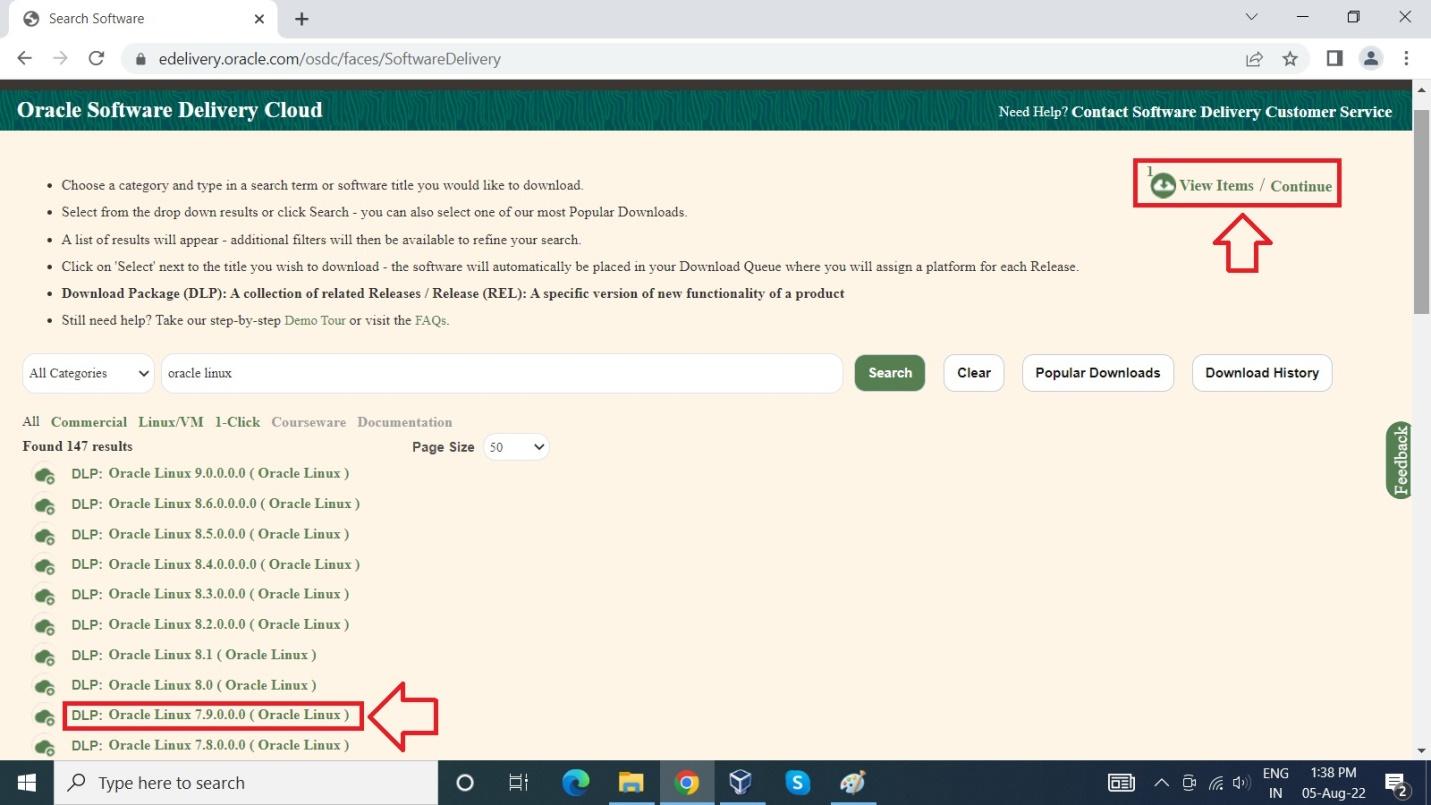
Step 6: From the results, Click on Oracle Linux 7.9.0.0.0(Oracle Linux)
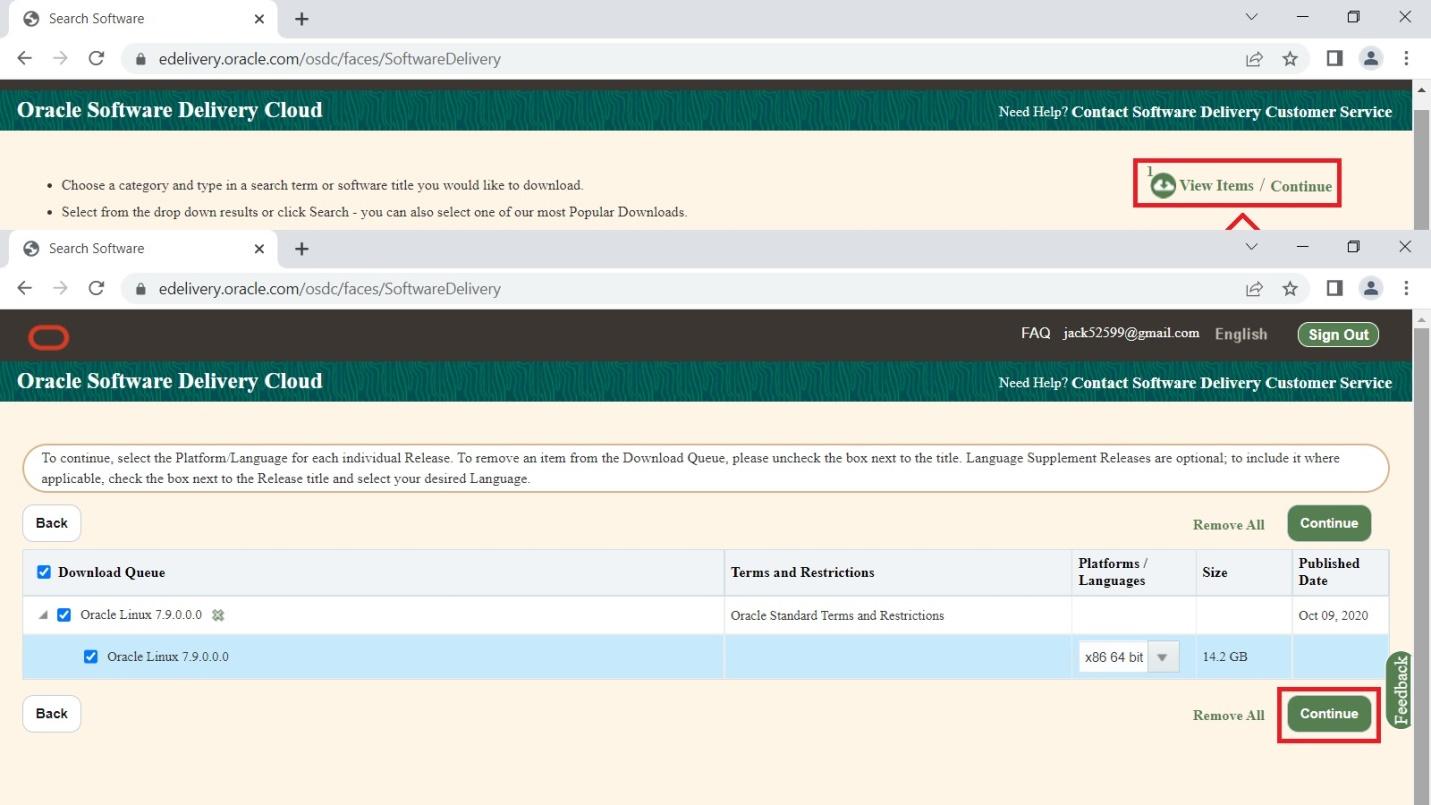
Step 7: After selecting the required version, Click on Continue on the top right corner of the page.
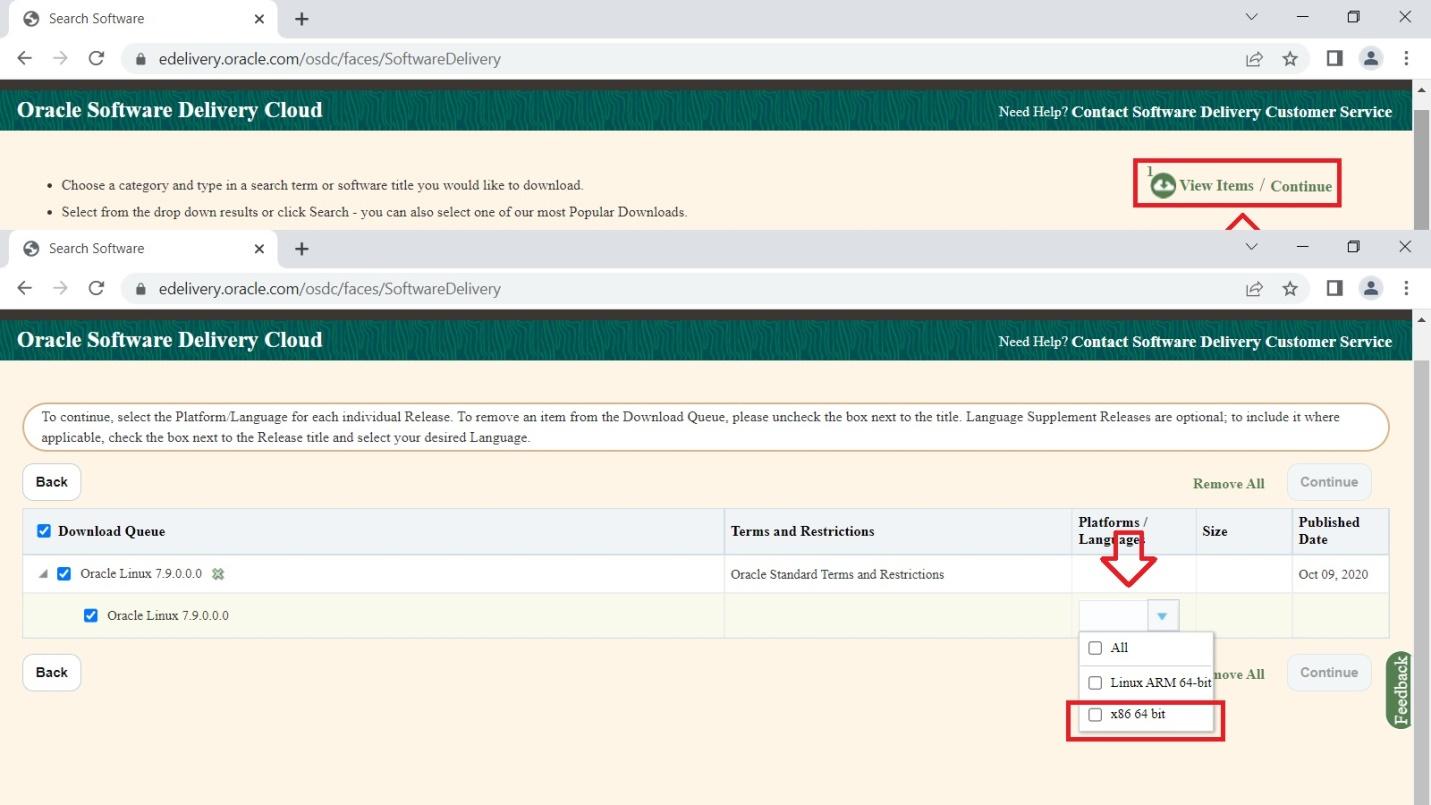
Step 8: Click on the dropdown button in Platforms/Languages and select x86 64 bit as we are supposed to install the Software in 64 bit Environment.
Step 9: Click on continue to proceed further with the download process.
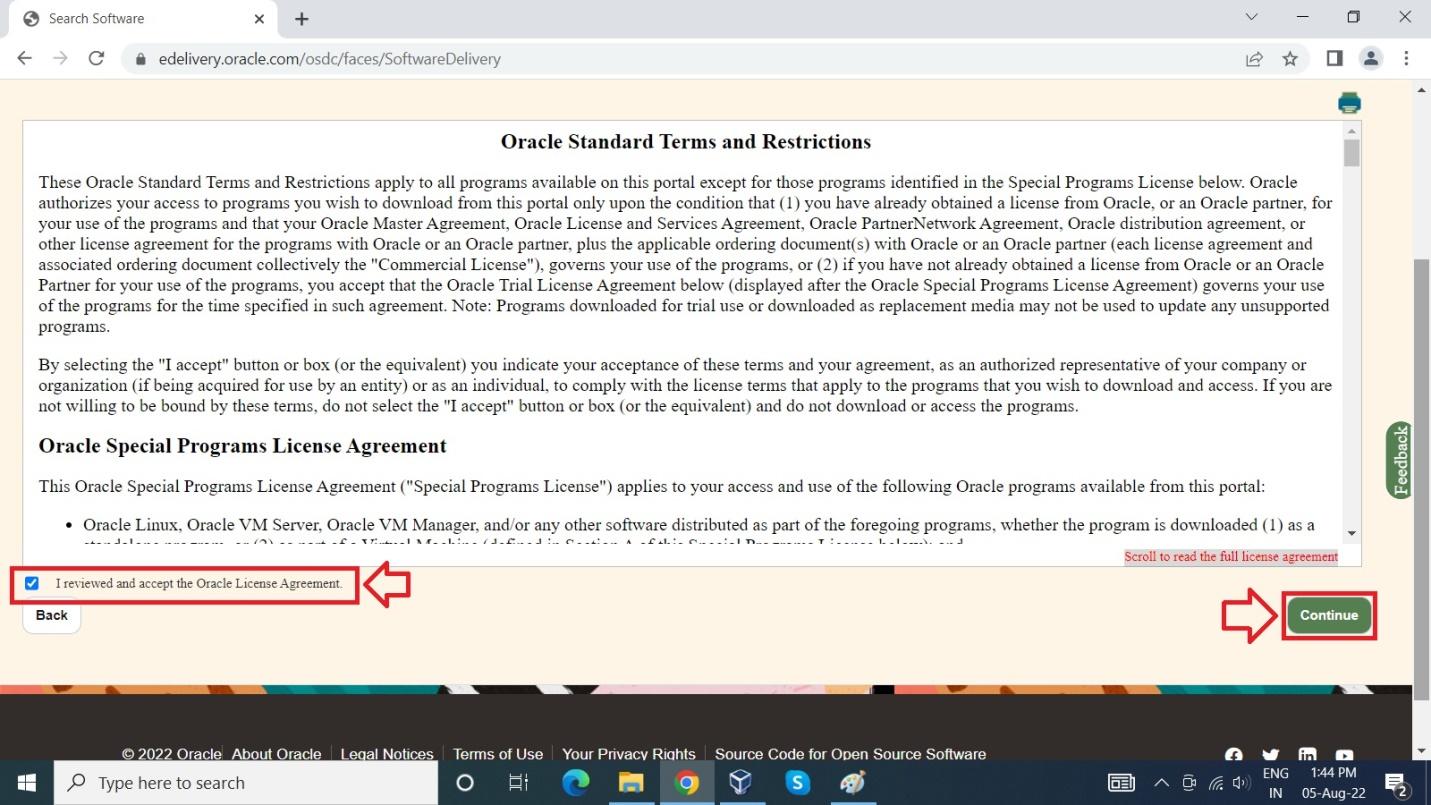
Step 10: Carefully read the License Agreement and Check the box I reviewed and accept the Oracle License Agreement and then Click on Continue.
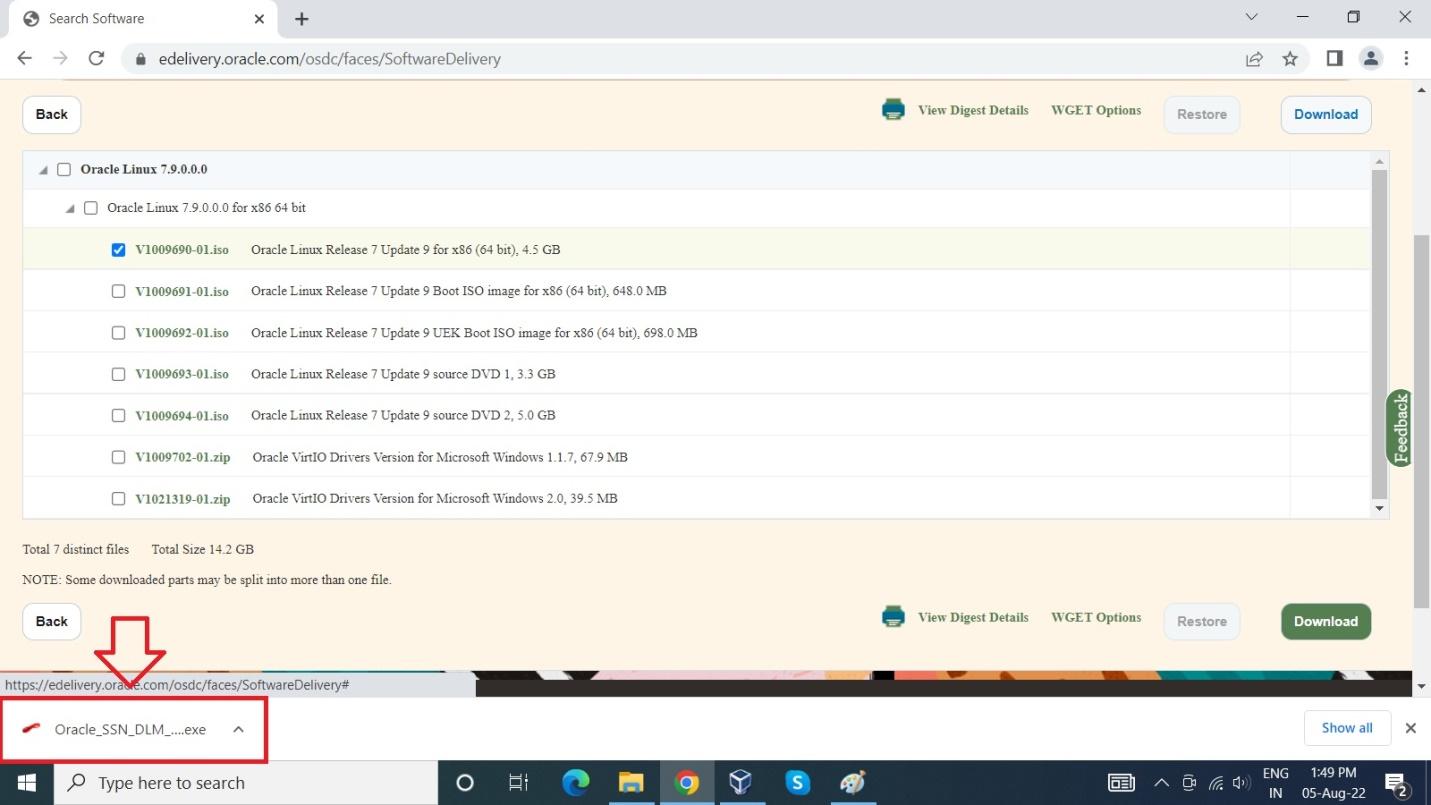
Step 11: In the page loaded, Check only Oracle Linux Release 7 Update 9 for x86(64 bit) and then click on Download to begin Download.

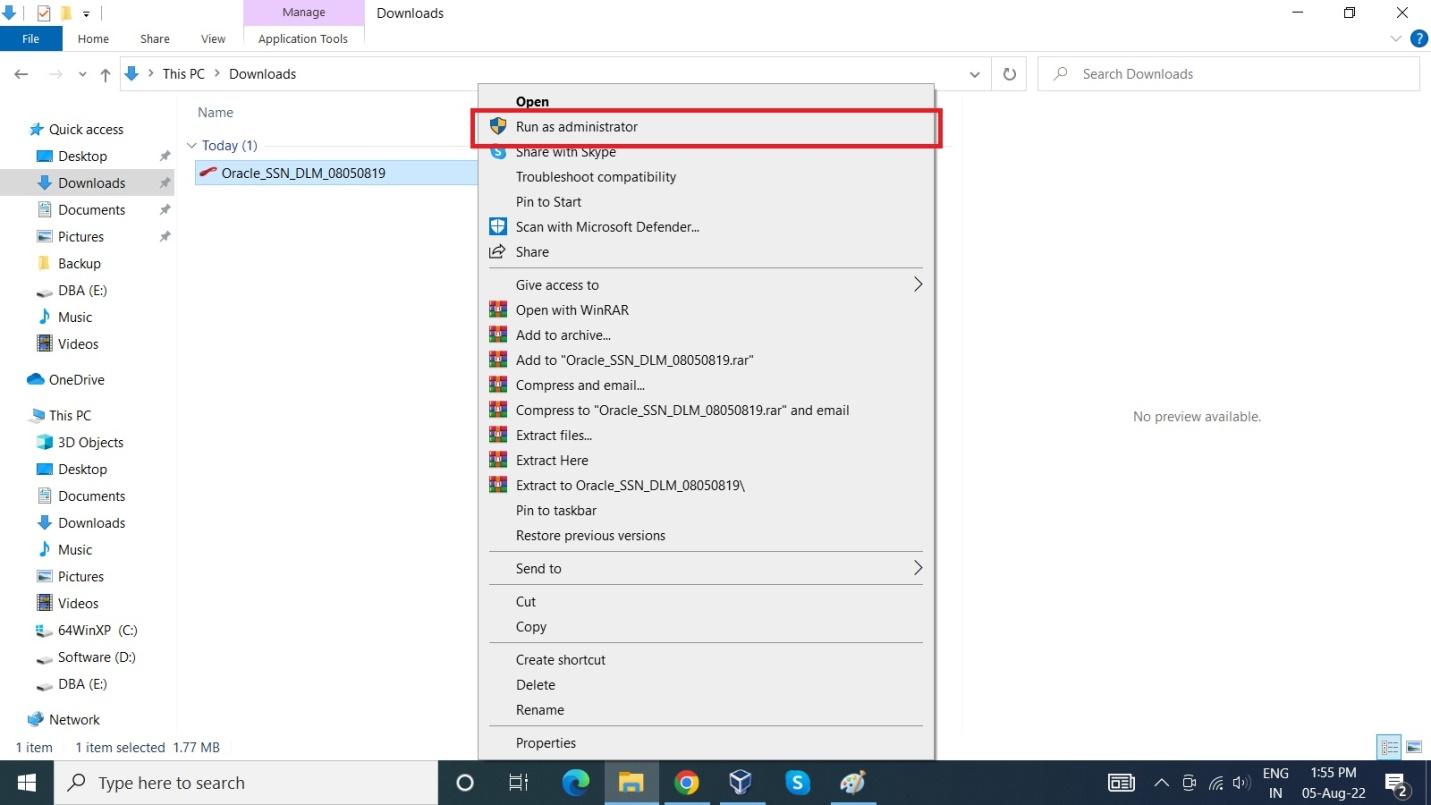
Step 12: After the file is Downloaded, Open the file Location.
Step 13: Right click on the file and Run as administrator.
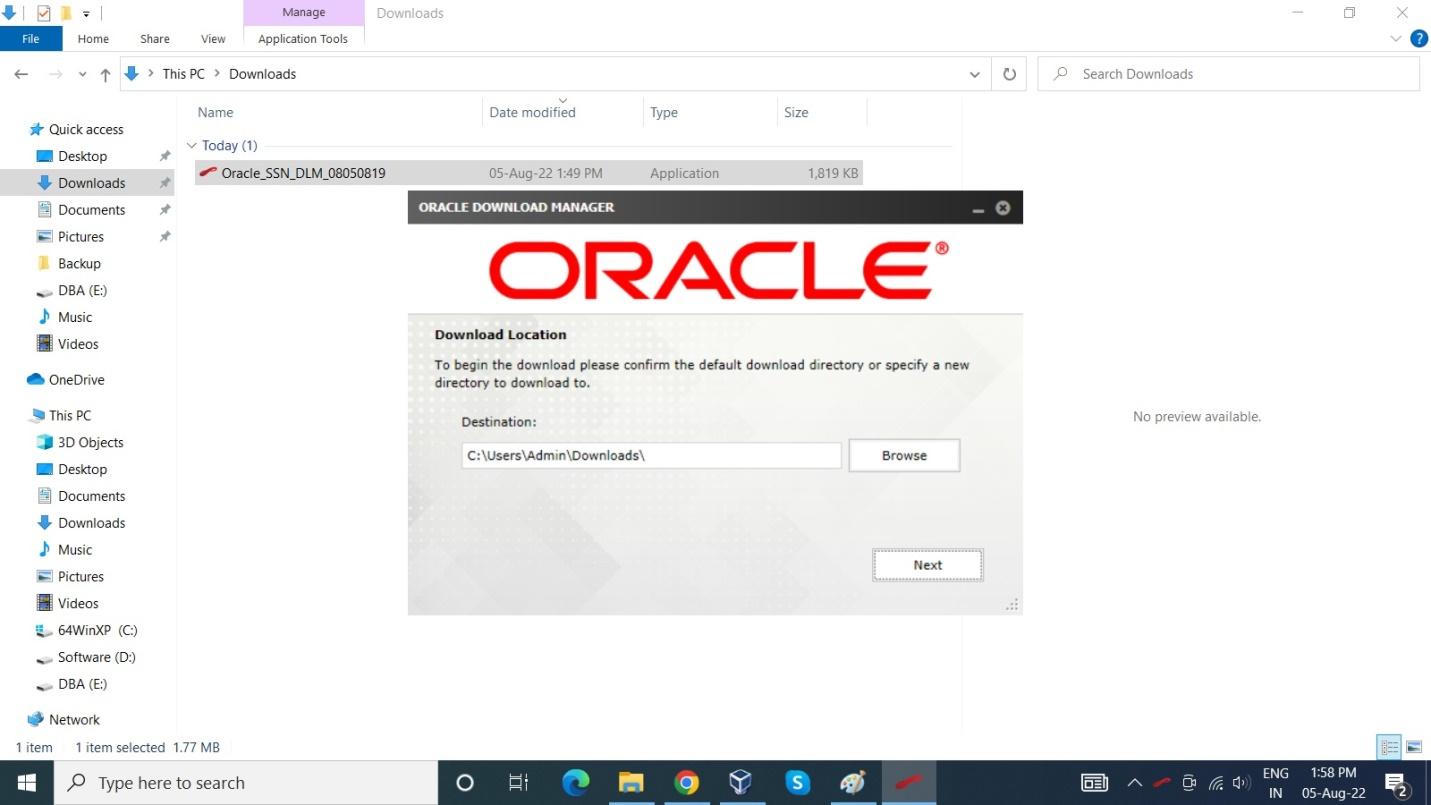
Step 14: Oracle Download Manager window opens. Select the path where you want to download the file and then click on Next. Oracle Linux will begin its download in zip format.
Oracle Linux Installation on Virtual box
Step:1 open virtual box Run the Virtual Box and click on the New button

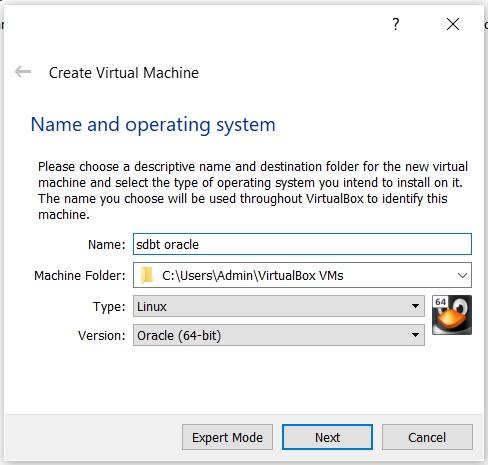
Step 2: Give name to your Oracle Linux installation on VirtualBox. For example, we have given “SDBT Oracle”.
After this in Type drop box select the Linux and the version as 64bit.
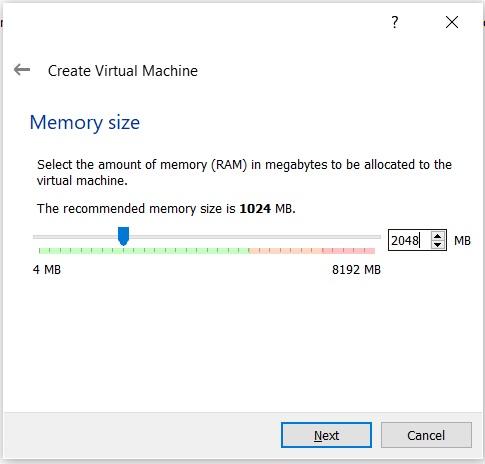
Step 3 : Assign the amount of RAM you want to give to your Oracle Virtual machine. The 2GB is recommended for a proper functioning of an Oracle server with GUI interface.
If you are installing the minimal version then you can assign a lower amount than this.
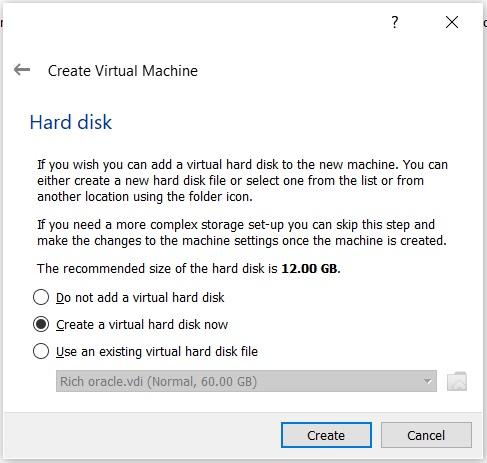
Step 4: The next step is to allocate an amount of space for the Oracle server installation. Select the option ‘Create a virtual hard disk now’
click on ‘Create’.
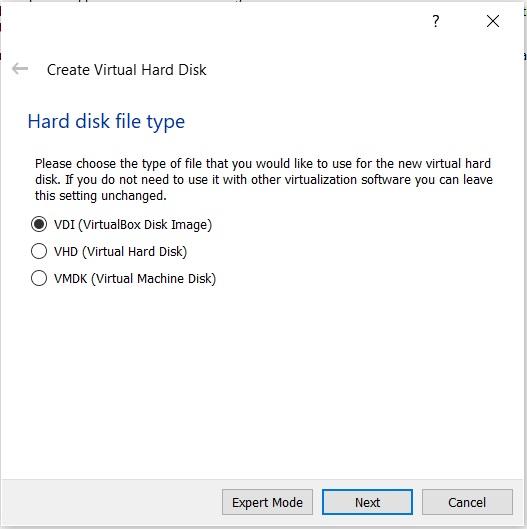
Step 5: Now choose VDI or VirtualBox Disk Image. Click on the ‘Next’ button.
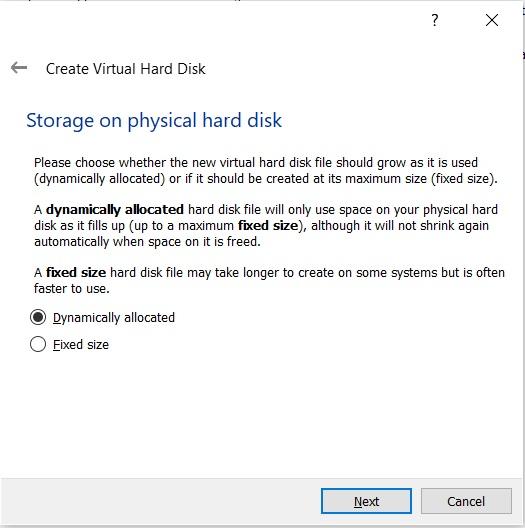
Step 6: Now select Dynamically allocated for allocating space dynamically and then click on next to proceed further.
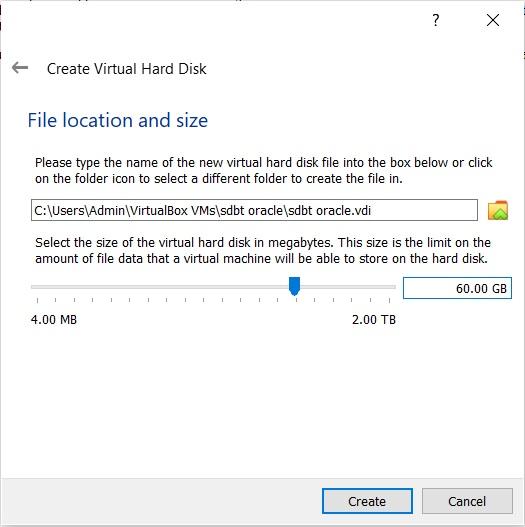
Step 7: The default file size for storage is 8Gb.
Use the slider and set it to least 60GB and then click on Create button to create a VM.
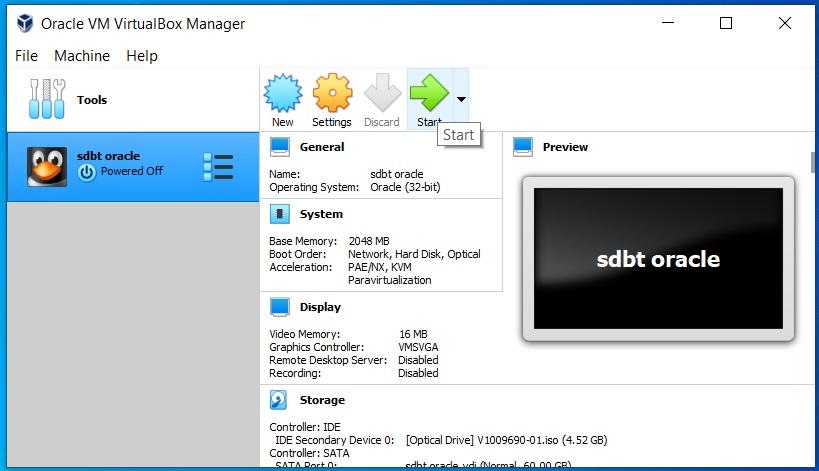
Step 8: After Create, Virtual machine is ready and Oracle VM VirtualBox Manager is Displayed. Click on Settings to configure the Virtual Machine.
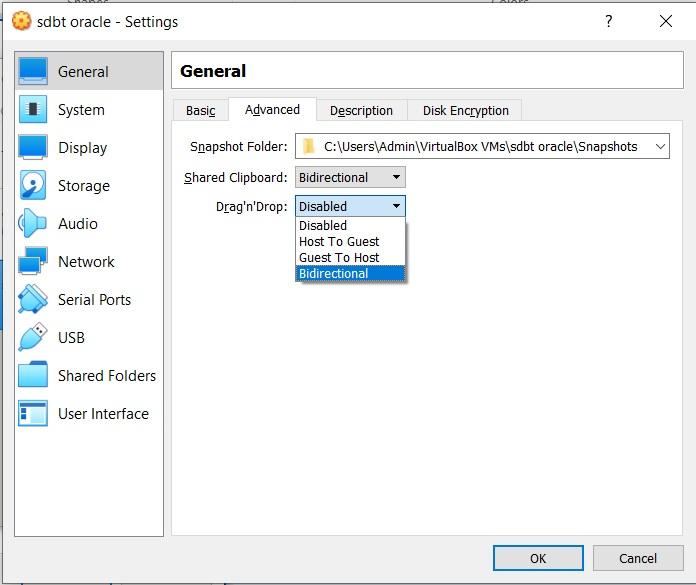
Step9: Click on General and then Select advanced option. Change the shared clipboard option to ‘Bidirectional’.
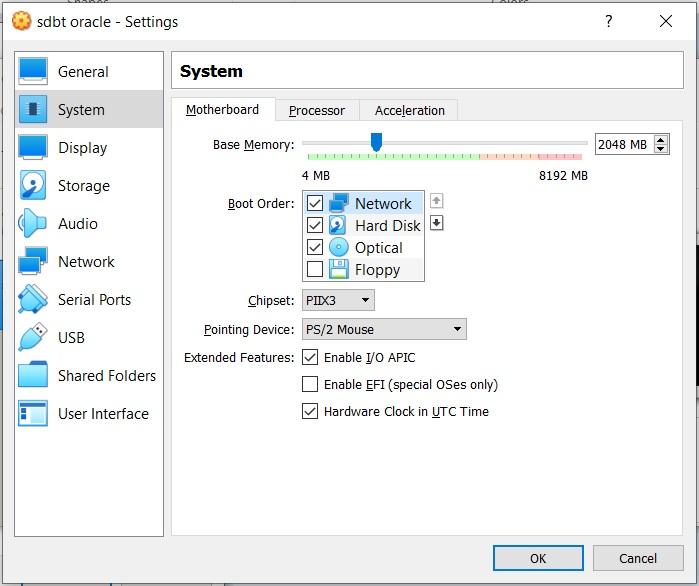
Step10: Click System, Set boot order as ‘Network’, ’Hard disk’, ’Optical’ and unselect the Floppy.
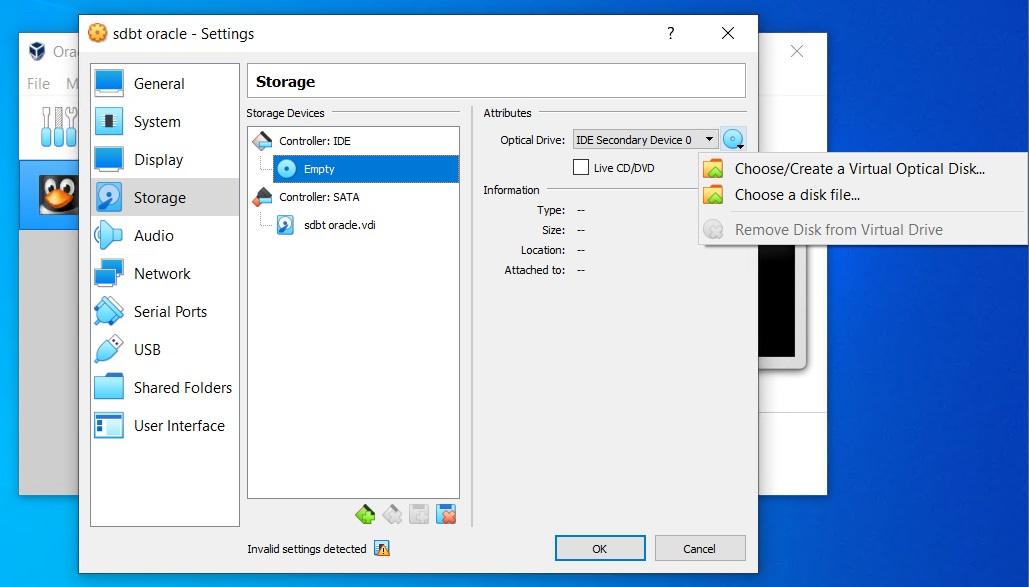
Step11: In storage, click on ‘Empty’ in attributes. Click on optical drive and select choose a disk file from the dropdown.
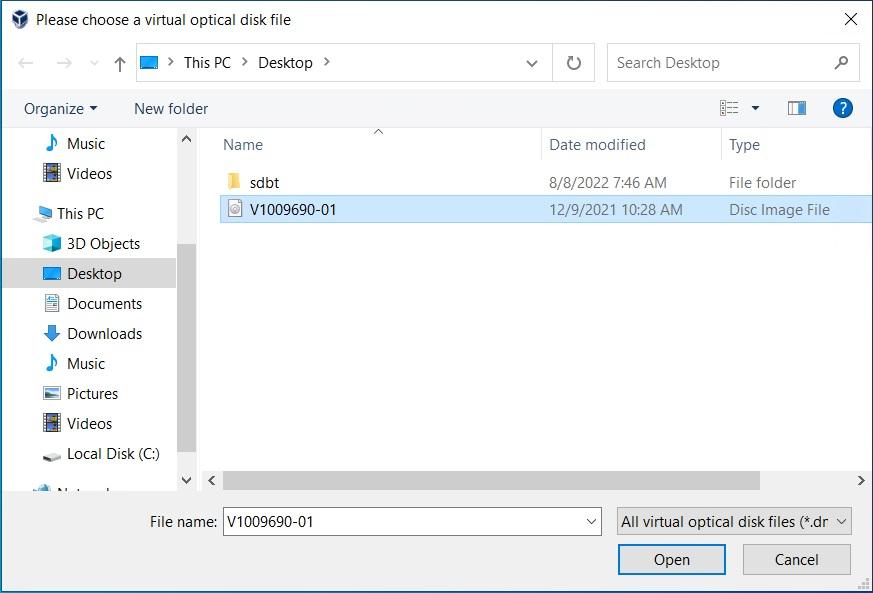
Step 12: Select the file which you have downloaded from Oracle edelivery website.
Click on the ‘Open’ button.
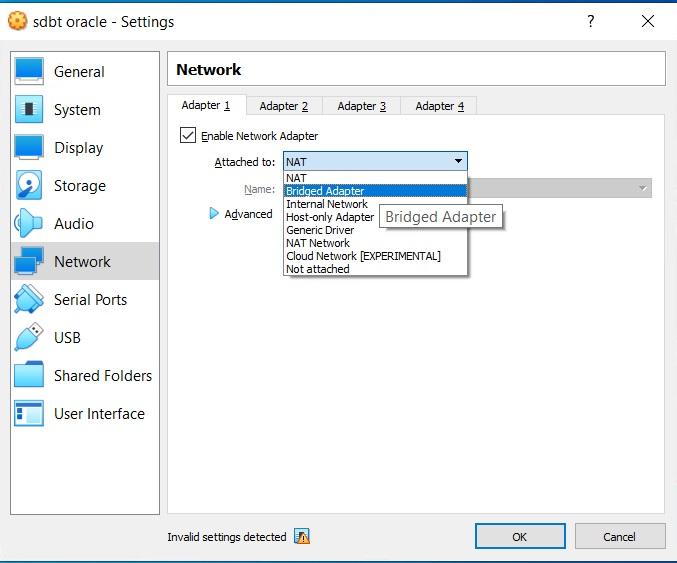
Step 13: Next move to network, in Attached to choose ‘Bridged Adapter’ .
Click on the ‘OK’ button.
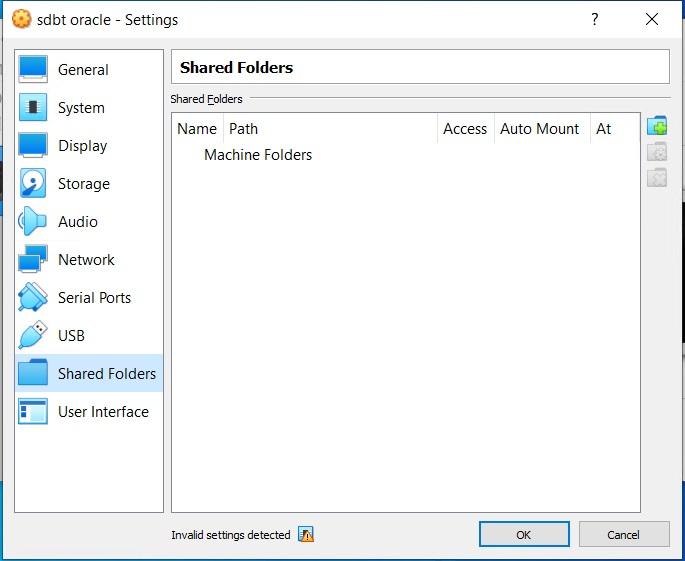
Step 14: Next move to ‘shared folders’, Click on the add folder icon.
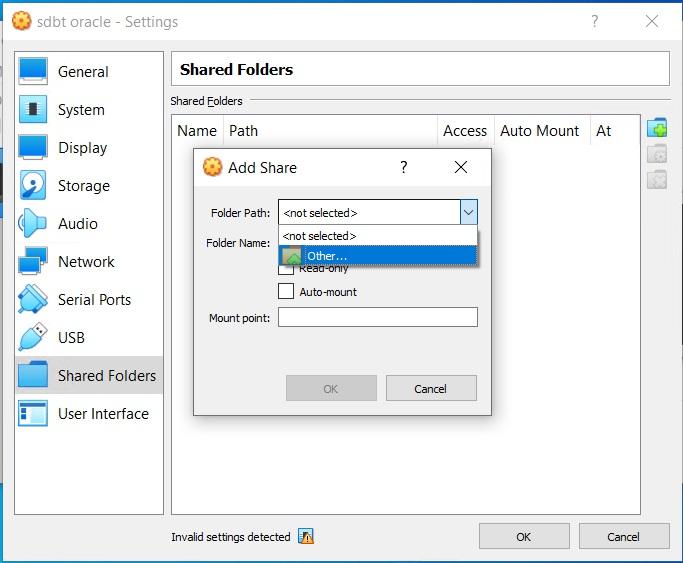
After Clicking add folder icon, Select ‘Other’ to choose the path of the shared folder.
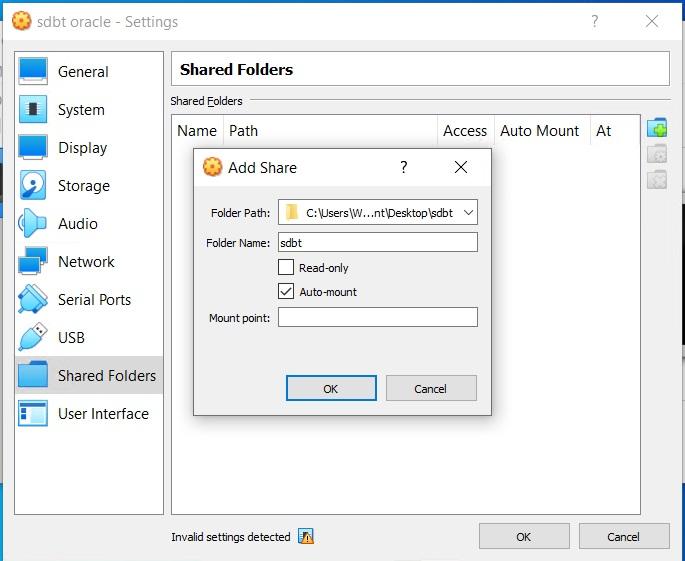
And then select ‘Auto-Mount’, Click on the ‘OK’ button.
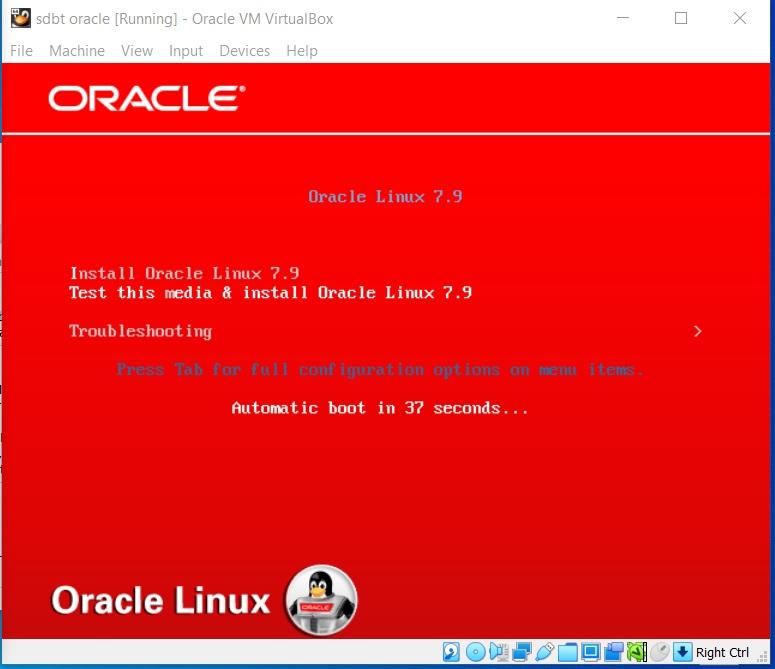
Step15: The boot screen of this Oracle server will appear. From the keyboard, use the arrow keys and select the first option “Install Oracle Linux 7.9”
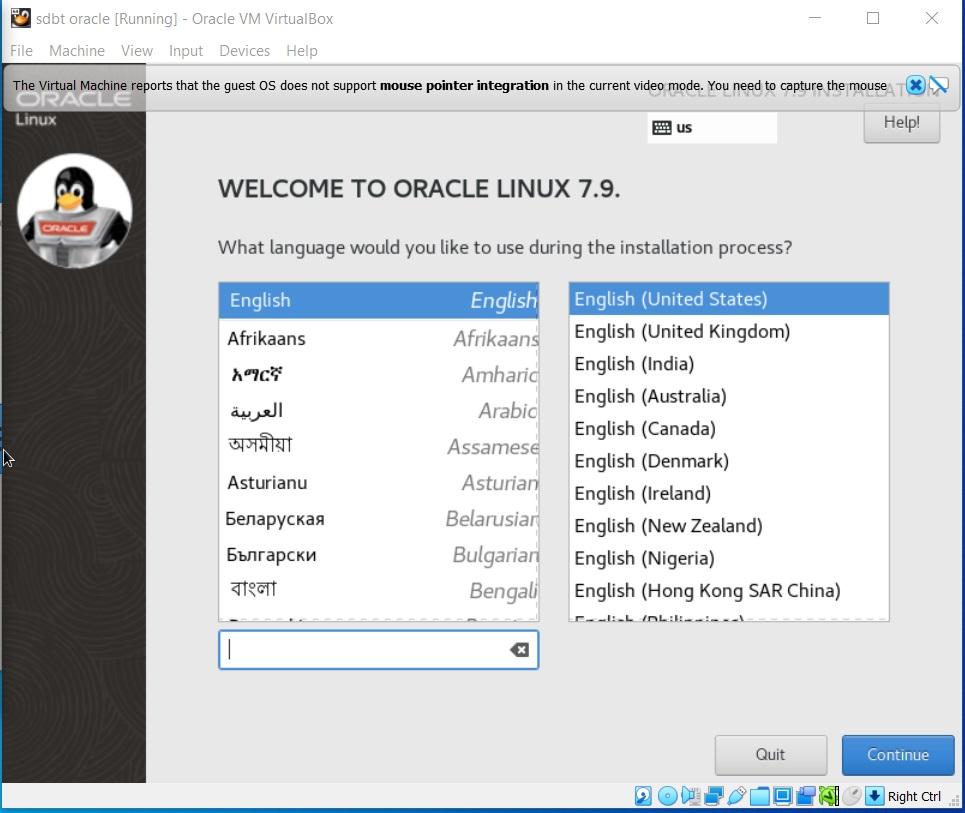
Step16: Next set the language for your Oracle server operating system. By default it is English.
Click on the Continue button.
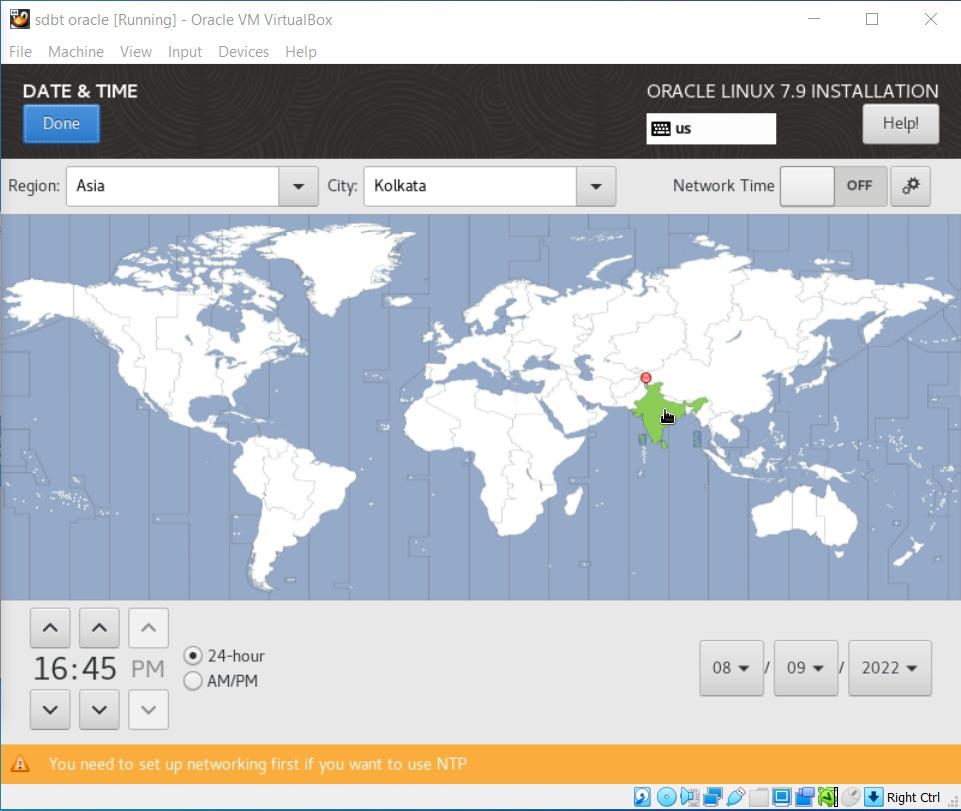
Step17: Select Data & Time option to set the default system time.
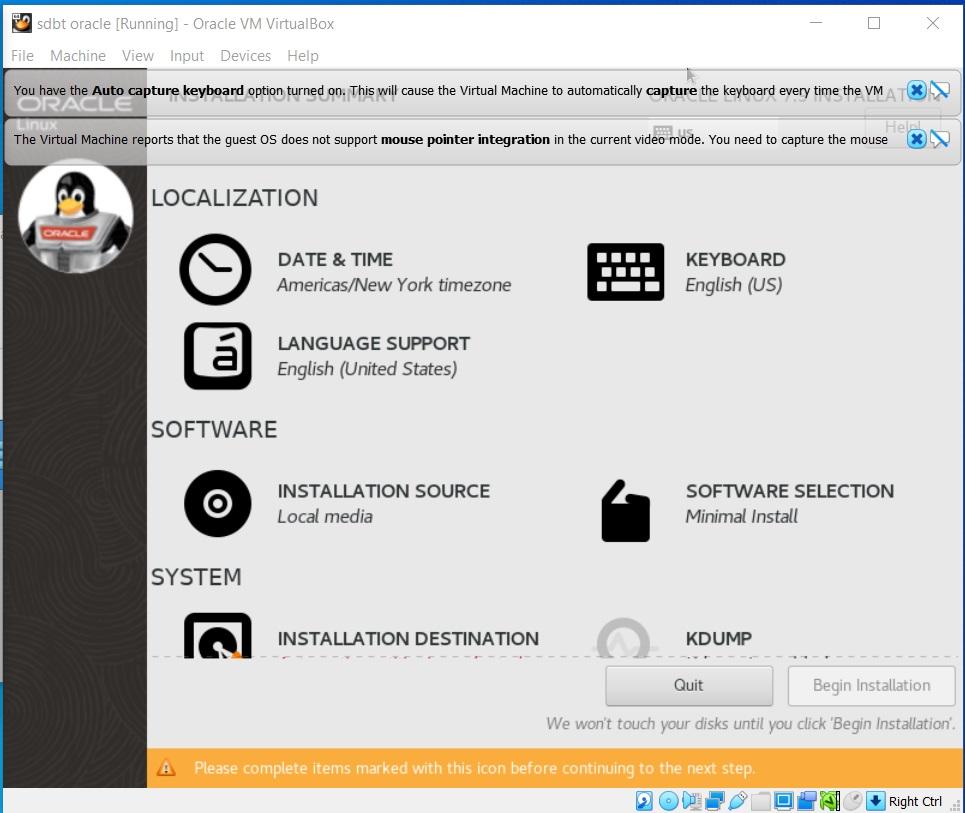
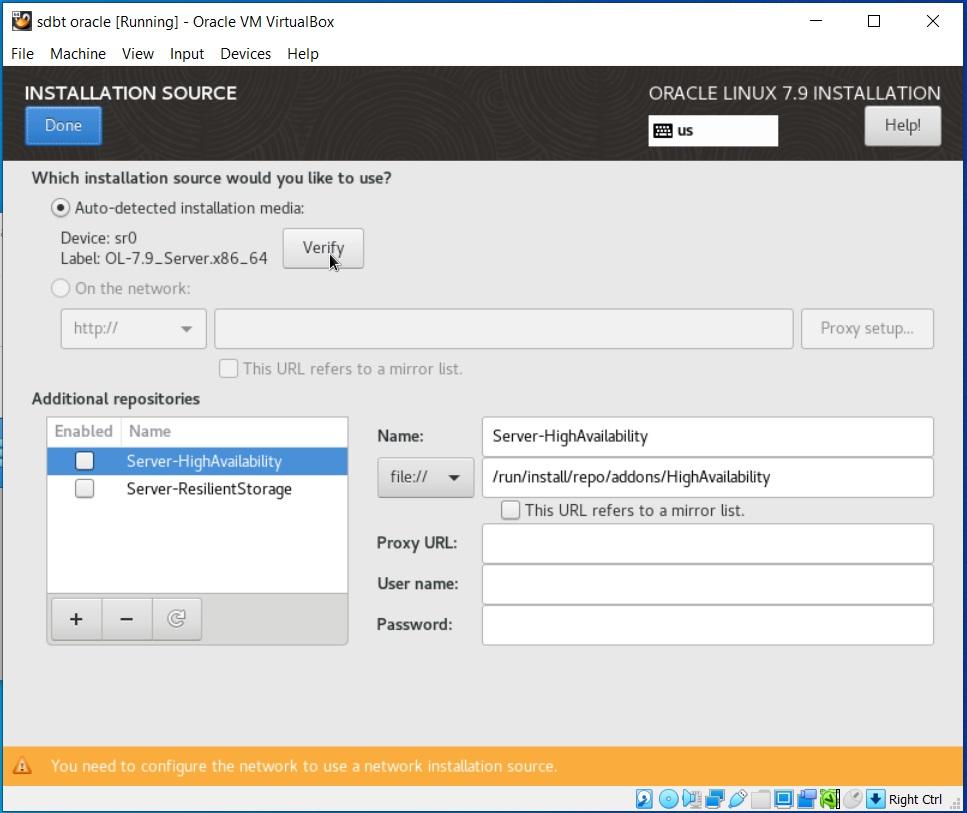
Step18: Click on the Installation Source option to set the partition.
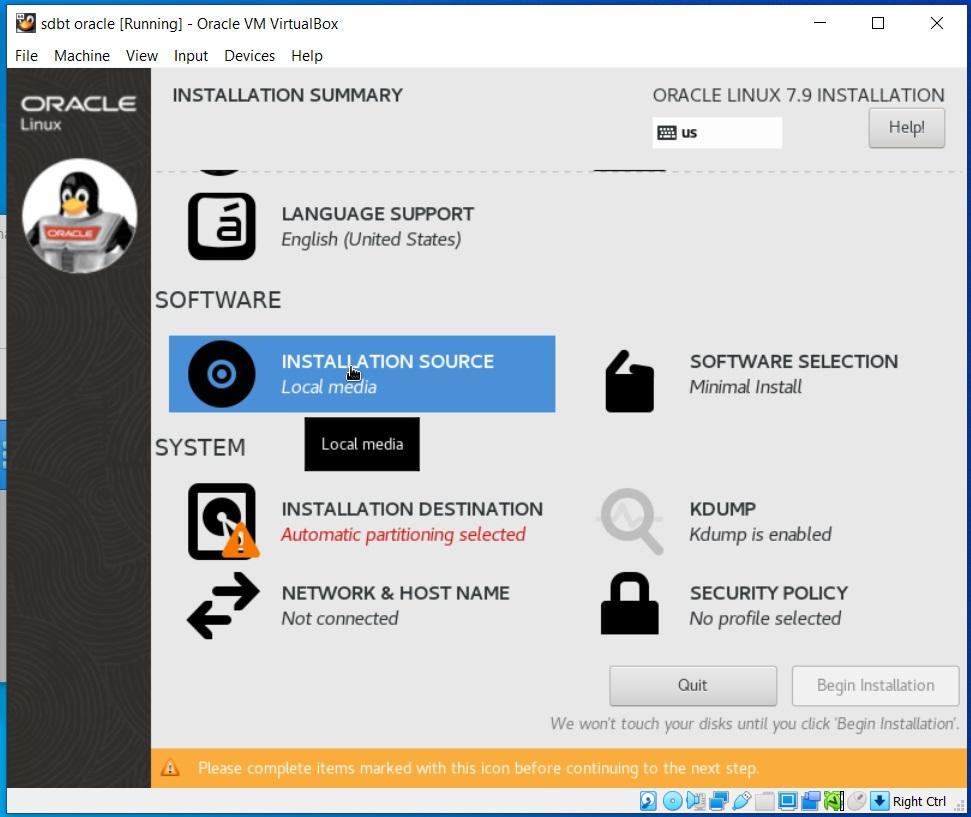
Verify the installation source file using the verify button.
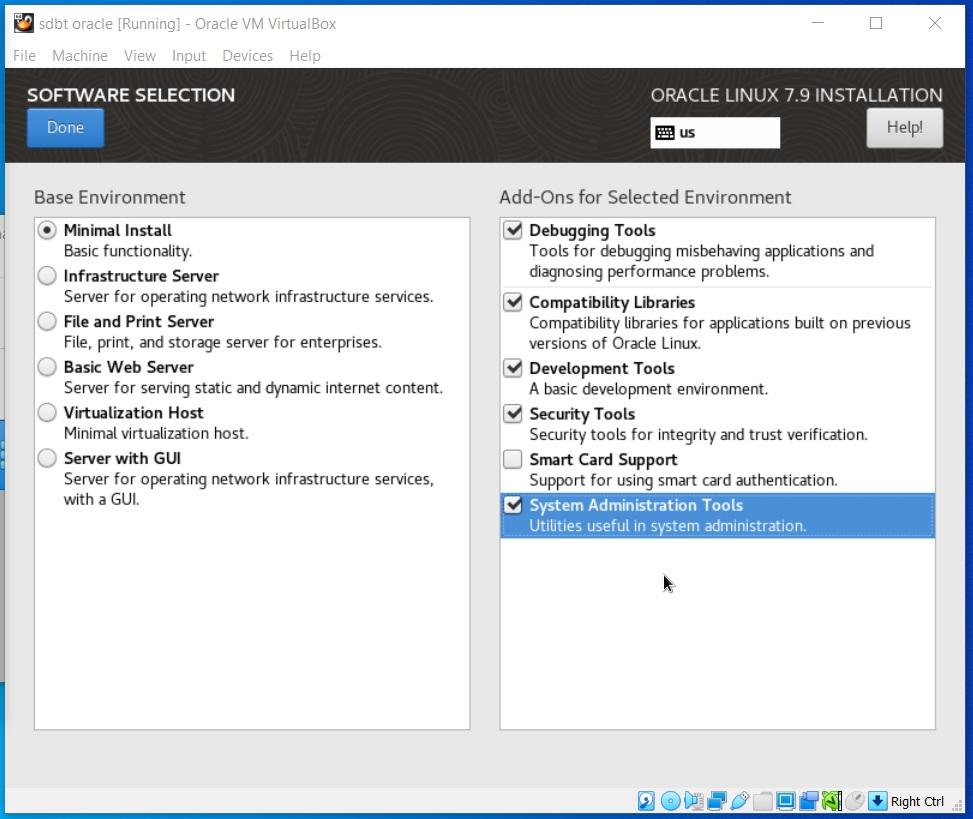
Step19: Now select , Software Selection.

Step20: Select the Minimal install and Add-Ons Selected Debugging tools, Compatibility Libraries, Development tools and Security tools.
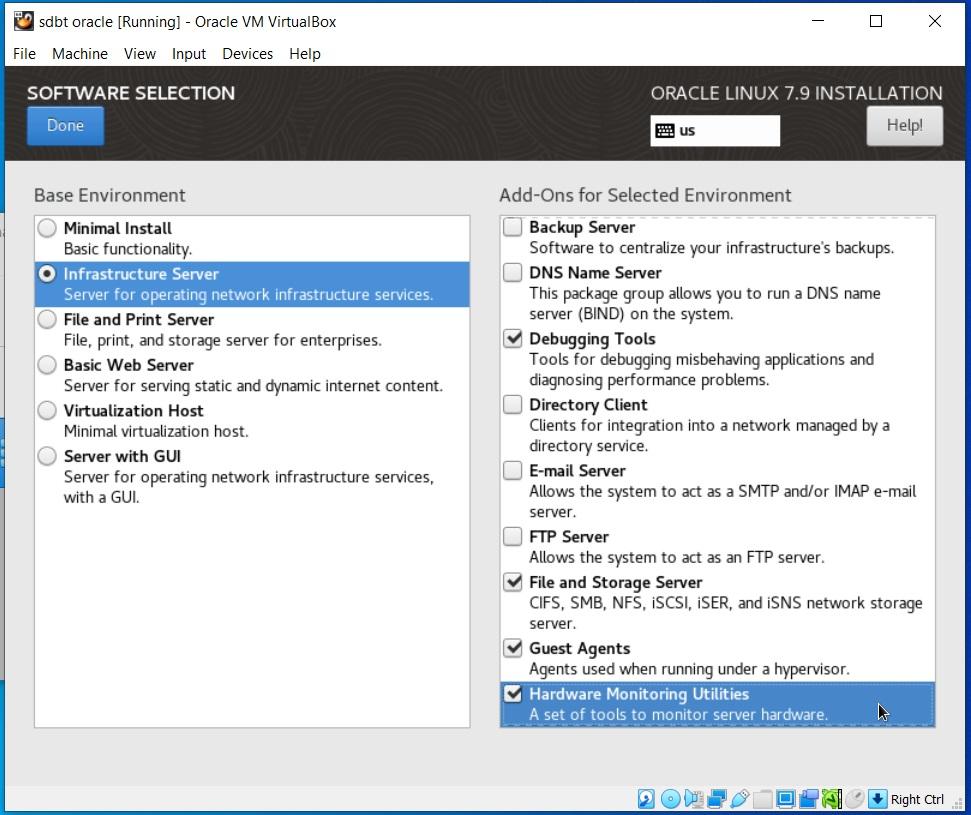
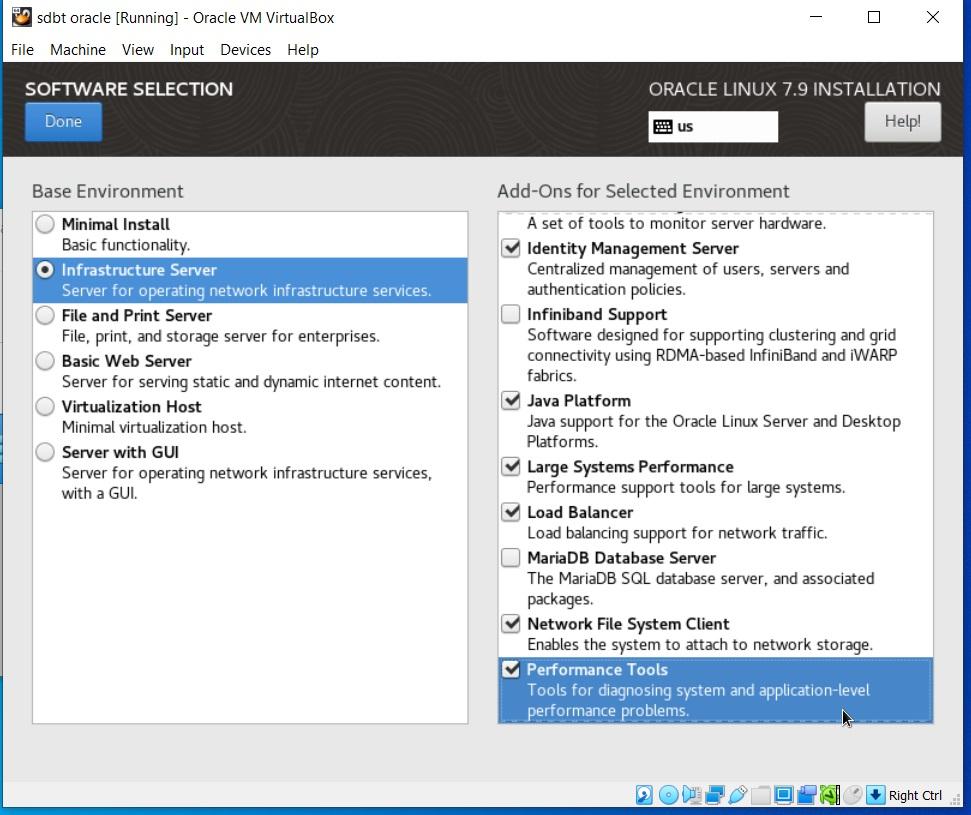
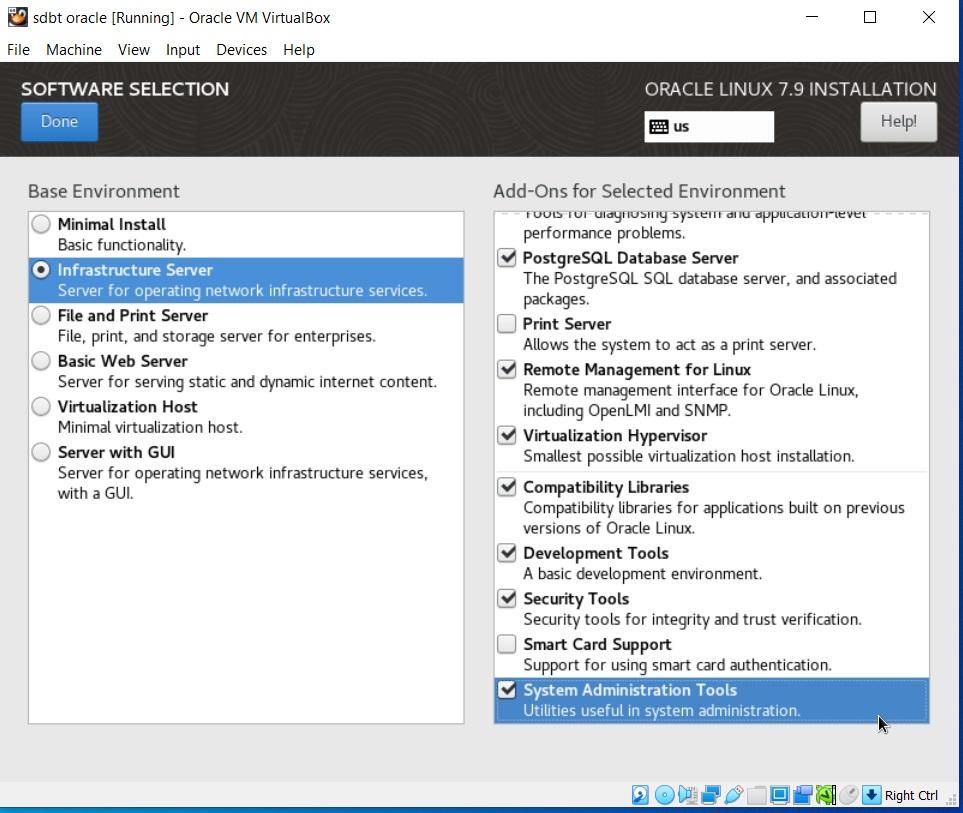
Select the Infrastructure server and Add-Ons Selected system administration tools, performance tools ,file and storage server ,Guest agent and hardware monitoring tools.
Also select Identity management server, Java platform, Large systems performance, Loaner Balancer ,Network file system client , Virtualization hypervisor and Remote management for Linux.
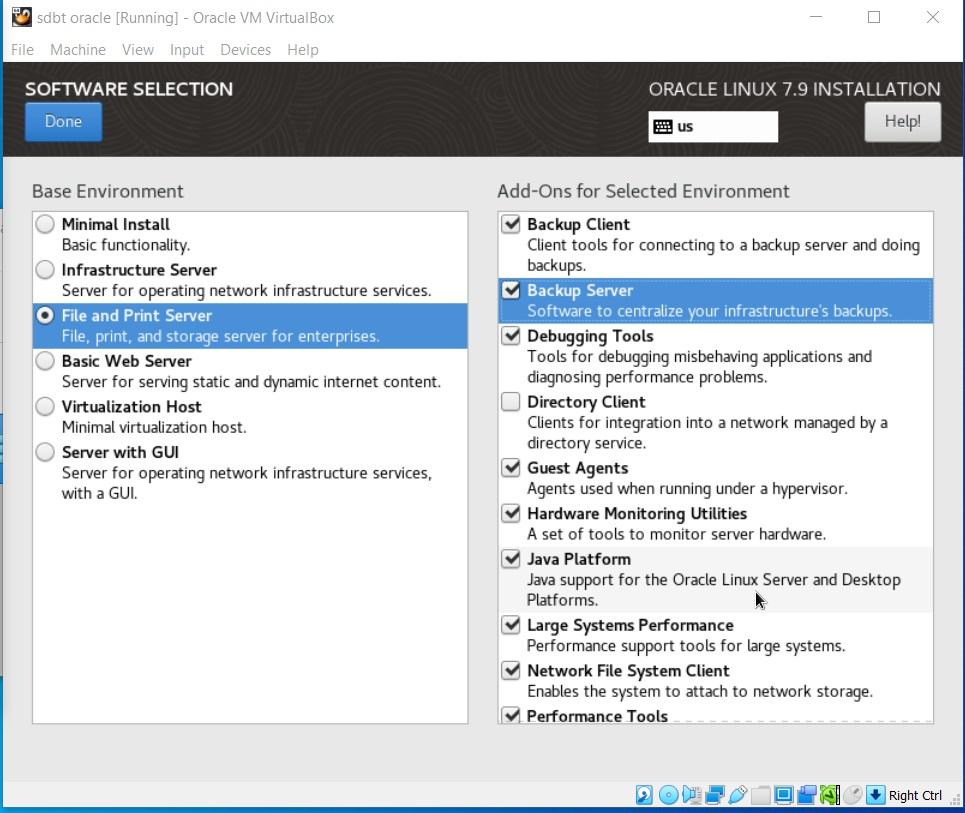
Select the file and print server and Add-Ons Selected Backup server and Backup client.
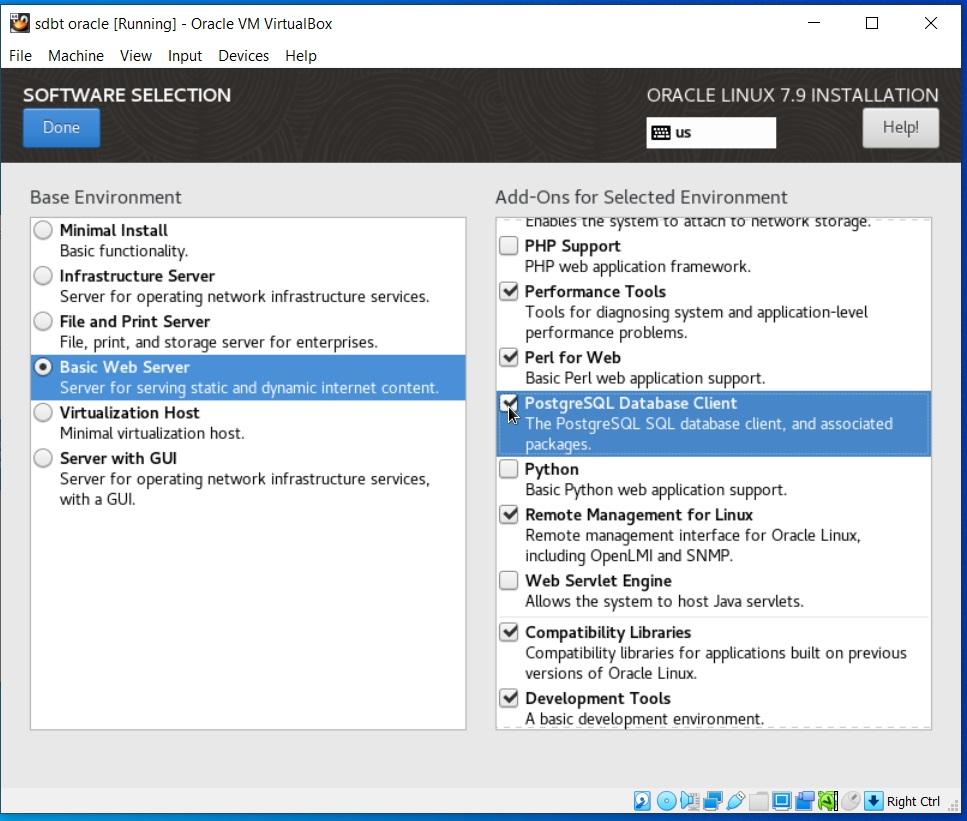
Select the Basic web server and Add-Ons Selected postgre sql database client and perl for web.
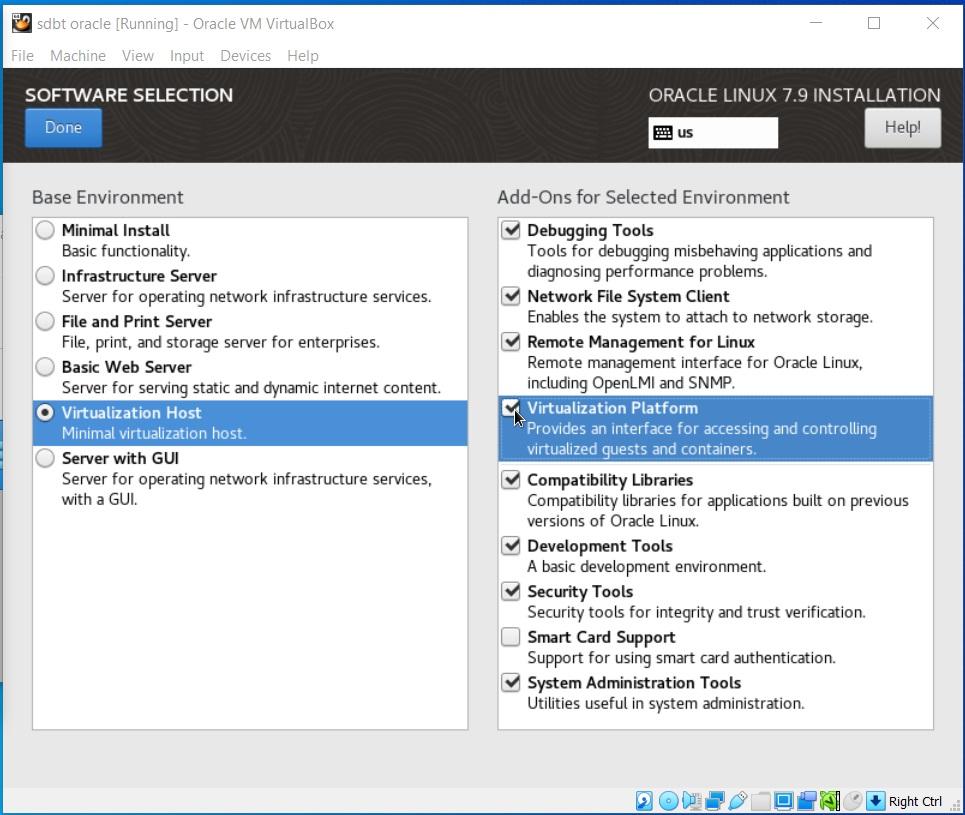
Select the virtualization host and Add-Ons Selected virtualization platform.
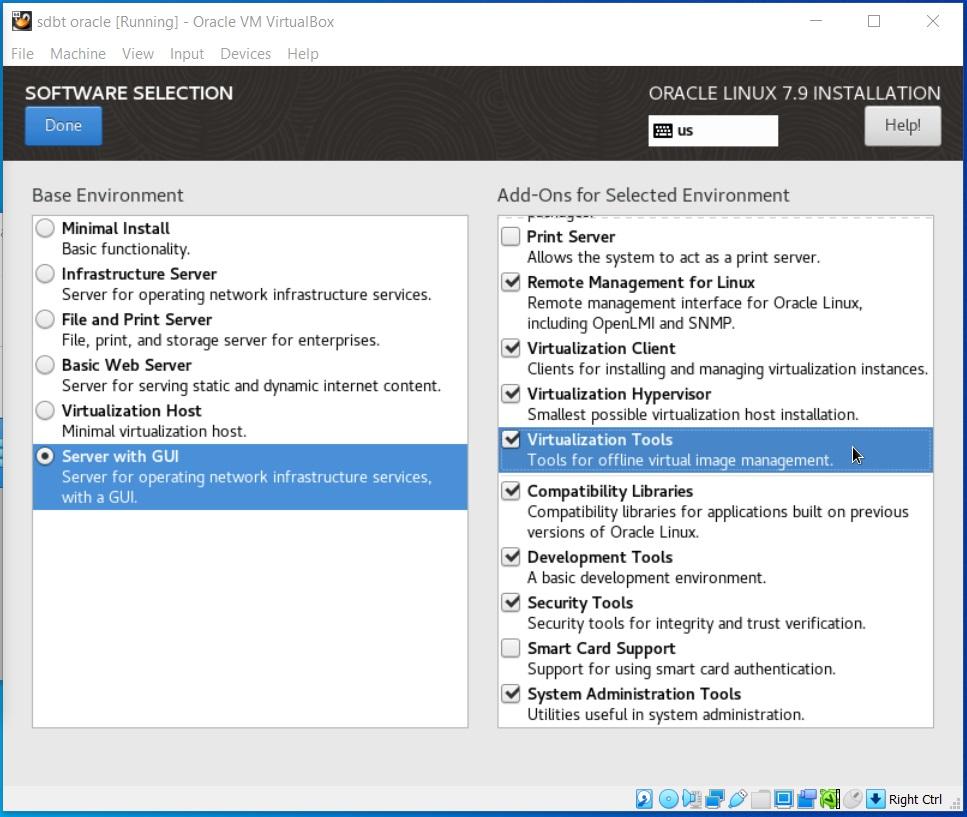
Select the Server with GUI and Add-Ons Selected virtualization tools and virtualization client
Click Done button.
Step21: Click on the Installation Destination option to set the partition.

Step22: Now click on the Network & Hostname option selection and simply use the toggle button turn ON for network configuration to get the internet connection.

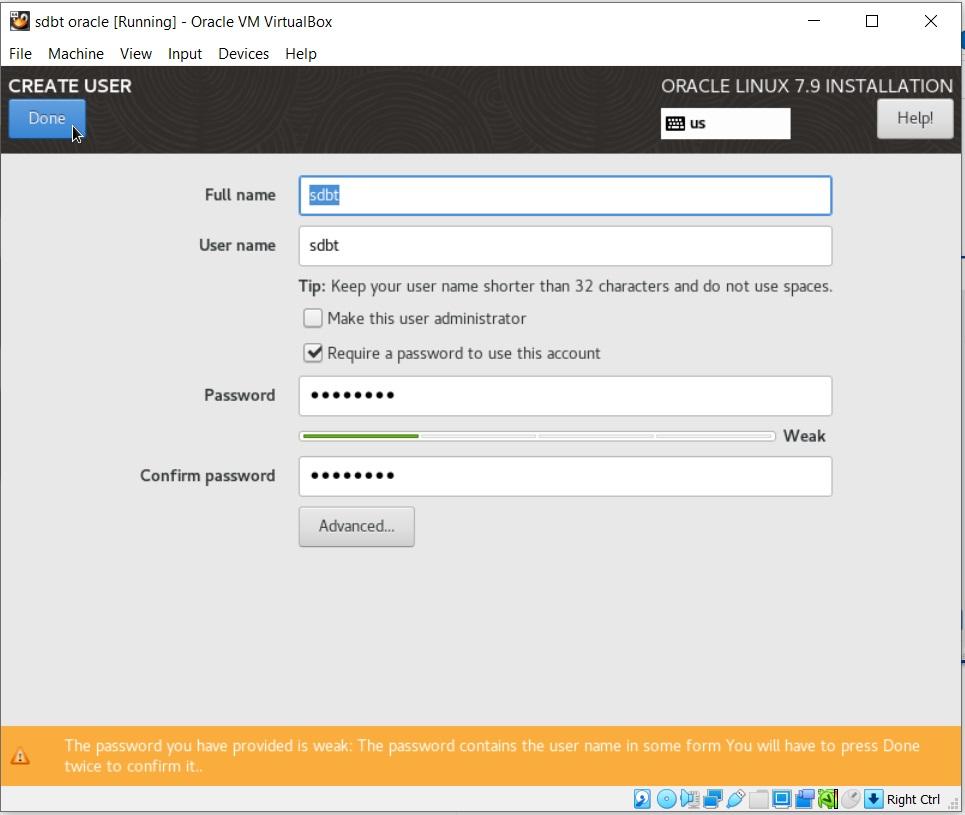
Step23: Once the root password setup is done. Go to the User creation and type the full name of the user you want to create on Oracle server plus username and password you want to assign to that.
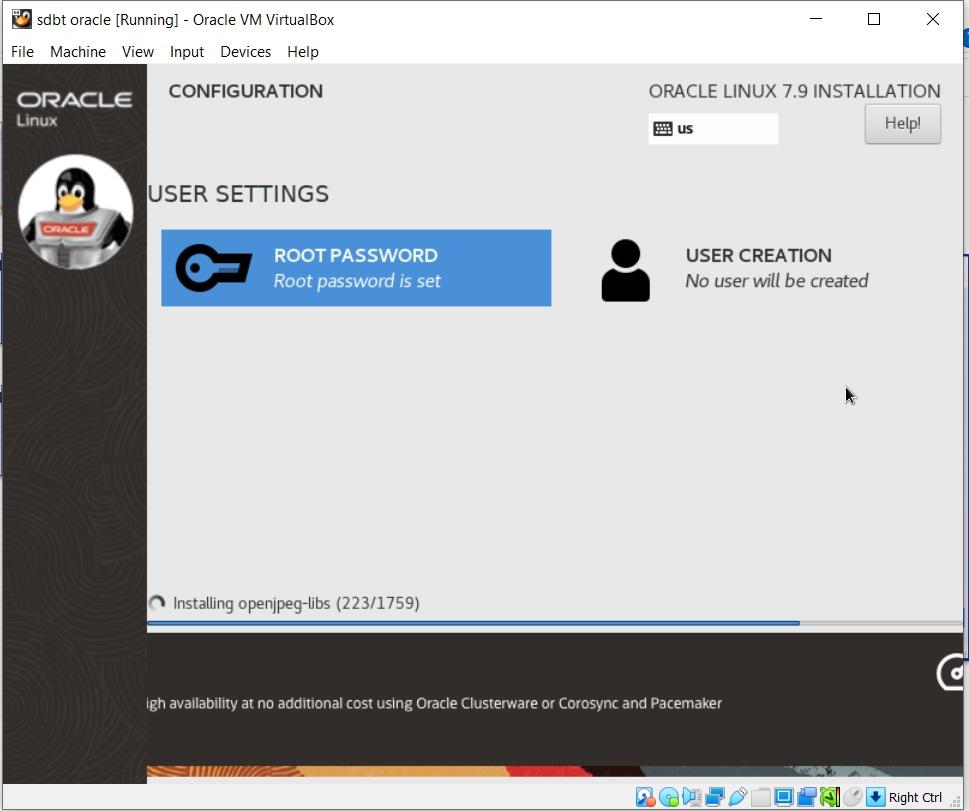
Enter the root password two times and then click on the Done button.
Step24: Finally, the Oracle Linux server is successfully installed on VirtualBox. If you want to install it on a real machine, still the steps mentioned here for installation will be the same.


Leave A Comment